Showing posts with label caps. Show all posts

Monday, December 3, 2007

Food Factor!

OK..time to follow a cap(crown)from start to finish...at our first visit about a week ago the patient came in with very irritated gums due to food impacting (getting stuck) between two teeth as a result of a large filling that was wearing away...see fig. 1

So we decided to place a cap on this tooth which would prevent the food impaction...I could have tried to place another filling, but in this case we chose to make a new cap.
In fig.2 you can see the tooth after being prepped for a cap and you can see just how badly the gums were suffering!
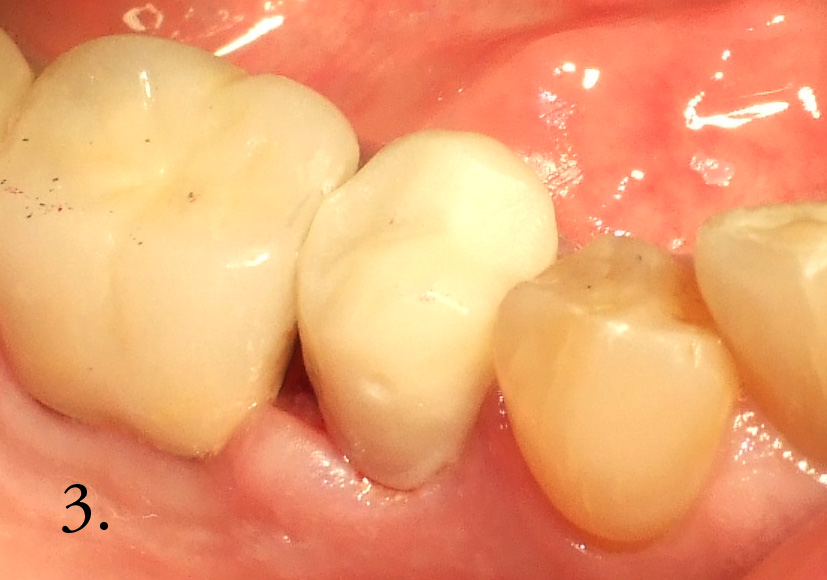
After taking an impression for a new cap I placed a temporary cap which the patient would wear until the new cap was made. Fig. 3 shows the temp cap cemented into place...

At this point the patient is dismissed and about 7 days later the patient returned and I cemented a well fitting new cap...fig. 4....you can see how nicely it fits at the gum line and you can even see how in just one week the gums have dramatically healed....the white blanching of the gums in typical when a new cap is placed and goes away in about a day.
so if you are getting food between your teeth...let me know!!

Monday, November 26, 2007

gums, gums, go away....

Hello Phellow Phlossers....

So the most common question I get when doing a crown(cap)is why do you need novocaine just to take an impression...well this post will help answer that question...
In fig. 1 we have what appears to be a very nice tooth....

but in fig. 2 I have drawn an outline around what is a large tooth colored filling existing in this tooth....we are going to prep this tooth for a crown and take an impression....

After preparing the tooth I have to take a rubber impression of the tooth so that my lab tech can fabricate a well fitting cap...but how do we get the rubber material to completely surround the lowest edges of the tooth at the gum line??
Well... we have to convince the gums to go away...at least temporarily...so that I can squirt some of the rubber to the edge of my preparation...and how do we do that...??
Well....we gently insert a small string or piece of chord into the space between the tooth and the gum...see fig. 3 and you can see the small space into which we place a layer of the string...

In fig. 4 you can see the space with the string in place...

And when I remove this string there is a nice little trough around the entire tooth into which I can squirt the rubber for my impression...see arrows in fig. 5

And this is why you need novocaine for an impression..the physical displacement of the gums to accomodate the rubber impression material is not something you want done without some anesthetic!!
After the impression was taken I placed a temporary crown and will try in the permanent crown next week...fig. 6

See you next time...

Tuesday, November 13, 2007

Caps for sale!

Ok...just when you thought all we did was nice easy stuff...here is a case sure to make your jaw ache!!...

This patient had gum surgery on her upper left quadrant and the existing crowns, which I had done 15 years ago now had all the edges exposed...it was really not very aesthetic. We therefore decided to replace the old crowns with new crowns that would meet the new gum line and provide a much nicer smile.
Figure 1. shows the crowns before we started...three crowns all had exposed edges.
Figure 2. shows how we remove crowns that are permanently cemented. A slit is drilled vertically into each crown and then we use a stiff straight instrument to wedge and loosen the crowns.
Figure 3. shows the temporary crowns that I made for the patient...which already provide a much more aesthetic result.

The patient is now dismissed and will return in a few days for an impression so that my lab can make the permanent caps...

So make sure to keep flossing so this doesn't happen to you!